
HAProxy is a free Open Source software act as a load balancer and proxy for TCP and HTTP application such as Apache. HAProxy was written in 2000 by Willy Tarreau,a core contributor to the Linux kernel, who still maintains the project. In this article we will setup HAProxy on a Centos 7. Previously we have setup MySQL clustering on Centos 7. My aim is to setup HAProxy for Apache web server in the same server which reside MySQL cluster.
We will use 5 servers. 1 server is for the control server and 4 other server act as web server.
For this guide we will use 5 CentOS 7 Virtual machine using VMware.
1. Management/proxy Node
192.168.0.133 proxy.inertz.org
2. Web server Node
192.168.0.134 web1.inertz.org
192.168.0.135 web2.inertz.org
192.168.0.136 web3.inertz.org
192.168.0.137 web4.inertz.org
The first step.
Setting the management node server by editing /etc/hosts file. The setting may look like similar as below;
[root@proxy ~]# cat /etc/hosts
127.0.0.1   localhost localhost.localdomain localhost4 localhost4.localdomain4
::1         localhost localhost.localdomain localhost6 localhost6.localdomain6
192.168.0.133 proxy proxy.inertz.org
192.168.0.134 web1 web1.inertz.org
192.168.0.135 web2 web2.inertz.org
192.168.0.136 web3 web3.inertz.org
192.168.0.137 web4 web4.inertz.org
The setup the remaining server /etc/hosts file with the configuration pointing to management/proxy server.
[root@web1 ~]# cat /etc/hosts
.......
192.168.0.133 proxy proxy.inertz.org

[root@web2 ~]# cat /etc/hosts
.......
192.168.0.133 proxy proxy.inertz.org

[root@web3 ~]# cat /etc/hosts
.......
192.168.0.133 proxy proxy.inertz.org

[root@web4 ~]# cat /etc/hosts
.......
192.168.0.133 proxy proxy.inertz.org
The second step is we need to install HAProxy in the management server.
yum -y install haproxy
When the installation finished, we need to edit the configuration file ‘/etc/haproxy/haproxy.cfg’ to suite our setting. My server setting is similar like below;
#---------------------------------------------------------------------
# Global settings
#---------------------------------------------------------------------
global
    log         127.0.0.1 local1     #Log configuration

    chroot      /var/lib/haproxy
    pidfile     /var/run/haproxy.pid
    maxconn     4000
    user        haproxy             #Haproxy running under user and group "haproxy"
    group       haproxy
    daemon

    # turn on stats unix socket
    stats socket /var/lib/haproxy/stats

#---------------------------------------------------------------------
# common defaults that all the 'listen' and 'backend' sections will
# use if not designated in their block
#---------------------------------------------------------------------
defaults
    mode                    http
    log                     global
    option                  httplog
    option                  dontlognull
    option http-server-close
    option forwardfor       except 127.0.0.0/8
    option                  redispatch
    retries                 3
    timeout http-request    10s
    timeout queue           1m
    timeout connect         10s
    timeout client          1m
    timeout server          1m
    timeout http-keep-alive 10s
    timeout check           10s
    maxconn                 3000

#---------------------------------------------------------------------
#HAProxy Monitoring Config
#---------------------------------------------------------------------
listen haproxy3-monitoring *:8080                #Haproxy Monitoring run on port 8080
    mode http
    option forwardfor
    option httpclose
    stats enable
    stats show-legends
    stats refresh 5s
    stats uri /stats                             #URL for HAProxy monitoring
    stats realm Haproxy\ Statistics
    stats auth haproxy:xxxxxxxxx            #User and Password for login to the monitoring dashboard *Set your own password
    stats admin if TRUE
    default_backend app-main

#---------------------------------------------------------------------
# FrontEnd Configuration
#---------------------------------------------------------------------
frontend main
    bind *:80
    option http-server-close
    option forwardfor
    default_backend app-main

#---------------------------------------------------------------------
# BackEnd roundrobin as balance algorithm
#---------------------------------------------------------------------
backend app-main
    balance roundrobin                                     #Balance algorithm
    option httpchk HEAD / HTTP/1.1\r\nHost:\ localhost    #Check the server application is up and healty - 200 status code
    server web1 192.168.0.134:80 check                 #webserver 1
    server web2 192.168.0.135:80 check                 #webserver 2
    server web3 192.168.0.136:80 check                 #webserver 3
    server web4 192.168.0.137:80 check                 #webserver 4
Still in the management server, we need to setup server log for HAProxy. Make sure UDP port 514 is open in the firewall because the daemon log will listen to his port. We need to edit ‘/etc/rsyslog.conf’ file and the configuration is similar like below;
[root@proxy ~]# cat /etc/rsyslog.conf
........
........

# Provides UDP syslog reception
$ModLoad imudp
$UDPServerRun 514
$UDPServerAddress 127.0.0.1
Then edit ‘/etc/rsyslog.d/haproxy.conf’
local1.=info     /var/log/haproxy-access.log
local1.notice    /var/log/haproxy-info.log
Restart syslog, start haproxy and enable haproxy at boot time.
systemctl restart rsyslog
systemctl start haproxy
systemctl enable haproxy
We have finished setup the HAProxy and now is the time to setup the remaining web server.
Just use command ‘yum -y install httpd‘ to install Apache web server. For easier batch install I recommend installing Clusterssh if you are using Windows server with WSL. All the 4 server will be use almost similar setting, using Clusterssh is the best choice.
Once the web server installed, we need to put test page to the webserver. Just put a simple test page as below;
[root@web1 ~]# cd /var/www/html/
[root@web1 html]# cat index.html
<html>
<H1>Web1 server</H1>
</html>
[root@web1 html]#

[root@web2 ~]# cd /var/www/html/
[root@web2 html]# cat index.html
<html>
<H1>Web2 server</H1>
</html>
[root@web2 html]#

[root@web3 ~]# cd /var/www/html/
[root@web3 html]# cat index.html
<html>
<H1>Web3 server</H1>
</html>
[root@web3 html]#

[root@web4 ~]# cd /var/www/html/
[root@web4 html]# cat index.html
<html>
<H1>Web4 server</H1>
</html>
[root@web4 html]#
Test all 4 webserver and make sure we can access the website.


Reboot all 4 server and make sure the webserver autostart.
The final step.
It is time now to check if our HAProxy is working or now. Just fire up the browser and open management server which was installed at : http://192.168.0.133/
If you refresh, you will get different server every time you refresh the browser. This indicates the HAProxy is working.
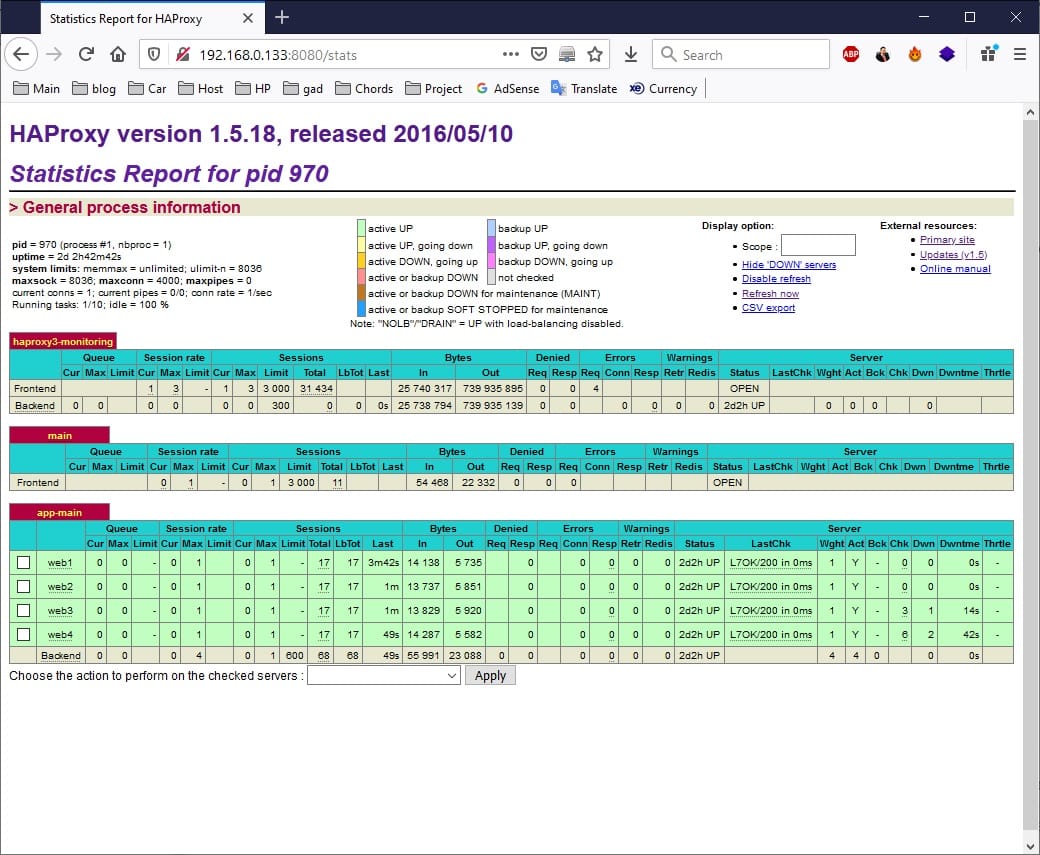
Remember earlier we have setup web monitoring proxy at port 8080. Make sure the port also allowed in the firewall. The URL for monitor is : http://192.168.0.133:8080/stats
HAProxy now working as a load balancer for the Apache web server.
Ref : https://www.howtoforge.com/tutorial/how-to-setup-haproxy-as-load-balancer-for-nginx-on-centos-7/